
Lesson 1: The Six-Dot Braille Cell and Dot Numbers
Watch Lesson 1: The Six-Dot Braille Cell and Dot Numbers
Watch the guided demonstration, pause to practise, then continue with the written lesson and exercises below.
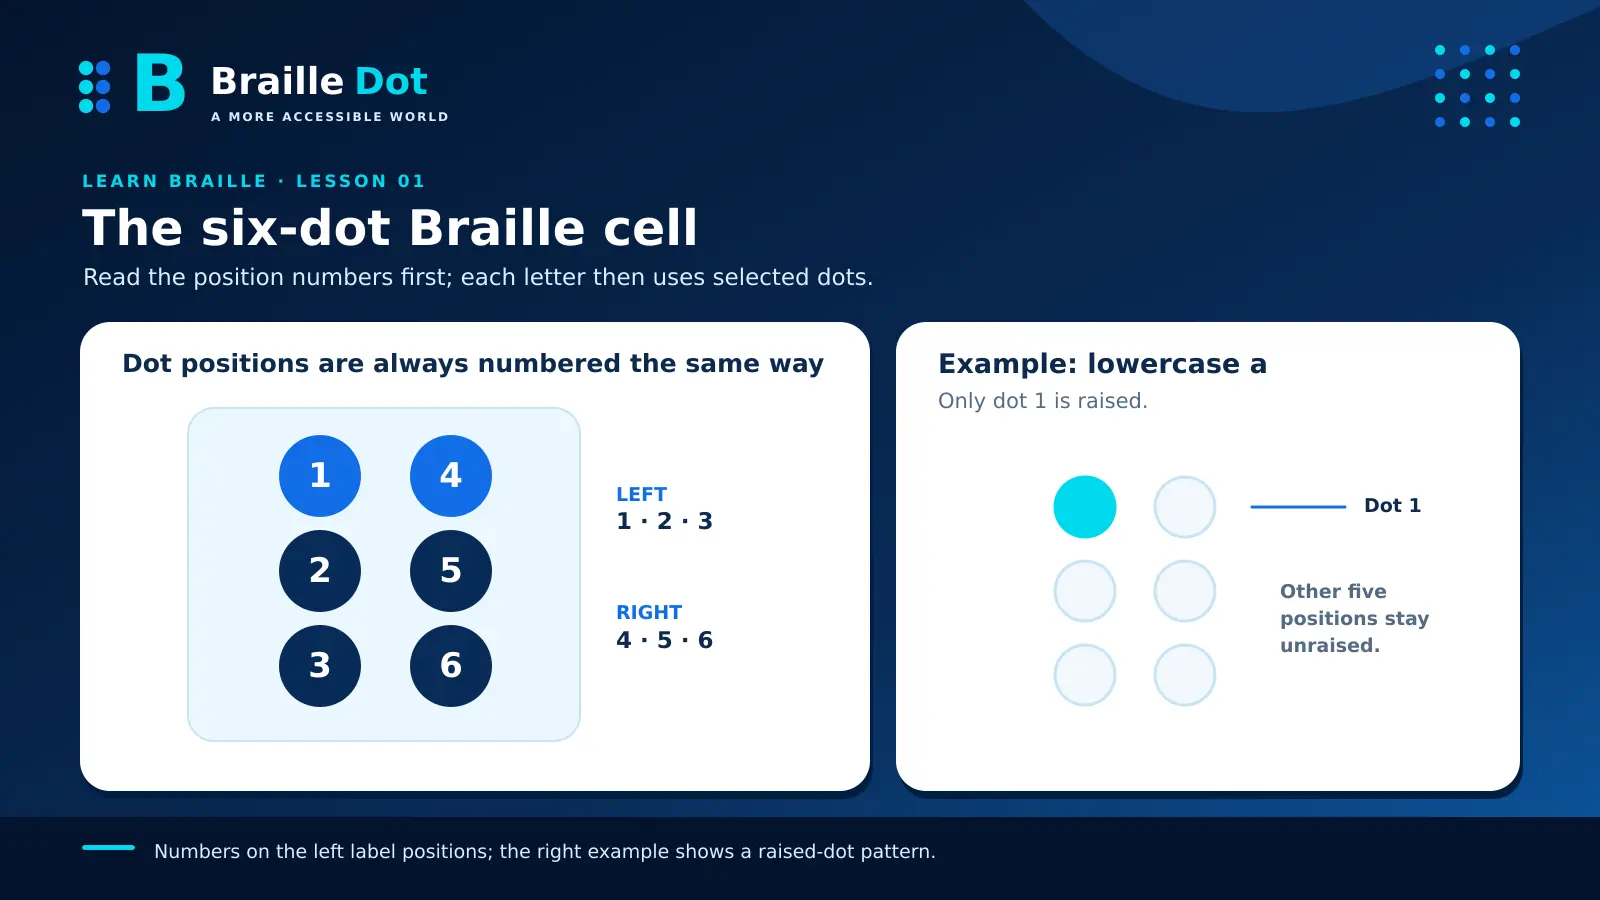
A Braille character fits inside a small rectangle with two columns and three rows. Each position can hold a raised dot or remain flat. You do not need to memorize the alphabet yet. Your first task is to know exactly where the six positions are and how to describe a pattern.
By the end of this lesson, you should be able to locate dots 1 through 6, identify which positions are raised in a displayed cell, and build a cell from a list of dot numbers. These are the foundations for the letter lessons that follow in our free Braille course.
The dot numbers stay in the same positions
Imagine a rectangle with three spaces down each side:
| Left column | Right column |
|---|---|
| 1 | 4 |
| 2 | 5 |
| 3 | 6 |
The numbering goes down the left column first, then down the right column. That is the part most beginners need to stop and check. Dot 2 sits below dot 1, not beside it. Dot 4 is the upper-right position, beside dot 1.
Try saying these locations without looking at the table:
- Upper-left: dot 1.
- Middle-left: dot 2.
- Lower-left: dot 3.
- Upper-right: dot 4.
- Middle-right: dot 5.
- Lower-right: dot 6.
The positions never move. Only the choice of raised dots changes.
One cell, many possible patterns
Here are five examples. The visible characters show the dot pattern, while the numbers tell you exactly which positions are raised.
| Braille cell | Raised dots | What to notice |
|---|---|---|
| ⠁ | 1 | One dot at the upper left. |
| ⠃ | 1, 2 | Two dots running down the left side. |
| ⠉ | 1, 4 | Two dots across the upper row. |
| ⠒ | 2, 5 | Two dots across the middle row. |
| ⠤ | 3, 6 | Two dots across the bottom row. |
The first three examples happen to be the Braille letters a, b, and c. For now, focus on their shapes. The letters come next.
One raised position does not mean one printed letter, and two raised positions do not mean two letters. A cell is one complete dot pattern. A word is usually made from several cells arranged in a line.
There are 64 possible states for a six-position cell if you count the cell with no raised dots. The important practical idea is simpler: every pattern can be described unambiguously by naming its raised positions.
Read a dot list as an instruction
Suppose a practice card says dots 1-4-5. Start with the familiar empty six-position rectangle:
- Raise the upper-left position (dot 1).
- Raise the upper-right position (dot 4).
- Raise the middle-right position (dot 5).
- Leave dots 2, 3, and 6 flat.
The resulting cell is ⠙. When we write 145, we mean the three raised positions 1, 4, and 5; it is a label for a cell, not the number one hundred forty-five.
Practice: read the raised dots
For each cell, write the dot numbers from smallest to largest. Keep the numbering grid above available for the first two, then try the remaining four without it.
| Question | Cell | Your dot numbers |
|---|---|---|
| A | ⠁ | ______ |
| B | ⠉ | ______ |
| C | ⠌ | ______ |
| D | ⠢ | ______ |
| E | ⠰ | ______ |
| F | ⠿ | ______ |
Show answers to the six dot-number questions
- A: 1.
- B: 1-4.
- C: 3-4.
- D: 2-6.
- E: 5-6.
- F: 1-2-3-4-5-6, all six dots.
If you mixed up C and D, return to the grid. Both have one raised dot in each column, but the left and right dots are at different heights.
Practice: build a cell from numbers
Now work in the opposite direction. You are given the raised dots, and you must choose the matching cell.
1. Dots 1-2:
- A. ⠃
- B. ⠉
- C. ⠒
2. Dots 1-4:
- A. ⠑
- B. ⠉
- C. ⠙
3. Dots 2-5:
- A. ⠤
- B. ⠒
- C. ⠰
4. Dots 1-4-5:
- A. ⠙
- B. ⠋
- C. ⠛
5. Dots 3-6:
- A. ⠠
- B. ⠤
- C. ⠄
Show answers and explanations
- A, ⠃. Dots 1 and 2 run vertically down the left side.
- B, ⠉. Dots 1 and 4 occupy the top row.
- B, ⠒. Dots 2 and 5 occupy the middle row.
- A, ⠙. Dot 1 is on the left; dots 4 and 5 are on the right.
- B, ⠤. Dots 3 and 6 occupy the bottom row.
Your two-minute no-chart check
Cover the numbering grid and close the answer sections. On paper or in your head, draw the six positions and label them without help. Then answer these three questions:
- What dot sits immediately below dot 4?
- Which dot sits beside dot 3?
- Which dots are raised in the new cell ⠦?
Show the two-minute check answers
- Dot 5.
- Dot 6.
- Dots 2-3-6.
If all three answers feel immediate, you are ready to learn letters. If you still have to count, repeat the six-dot grid once more. Fast recognition comes from knowing each position, not from guessing the outline of a symbol.
What screen Braille and raised Braille have in common
The characters on this page are visible representations of Braille cells. On paper or a refreshable Braille display, the raised positions can be read by touch. The dot numbering and letter assignments are the same, but recognizing a shape on a screen and reading it tactually are different skills. A learner developing tactile literacy should also practice with suitable raised-dot materials and guidance.
You can experiment with short input in the BrailleDot translator once you recognize the cells, but the goal of this lesson is to understand their positions without relying on automatic conversion.
For a complete dot-number reference outside the course, see how to read Braille dots. The next course lesson introduces the letters a through j using the positions you have just practiced.
Standards reference: International Council on English Braille, Rules of Unified English Braille, Third Edition (2024).
Written by Marcus Wren.